
Introduction
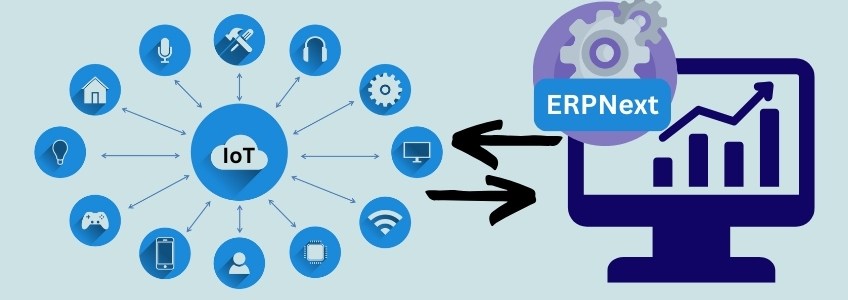
Integrating an IoT (Internet of Things) platform with ERPNext can significantly enhance operational efficiency and decision-making capabilities for businesses. The combination allows for real-time data capture from IoT devices, which can then be fed into ERPNext for further analysis, reporting, and automation.
This integration of IoT with ERPNext is particularly useful in industries like manufacturing, logistics, agriculture, and construction, where IoT devices can track inventory, monitor equipment health, and provide real-time insights.
This blog discusses in detail, how you can approach the integration of an IoT platform with ERPNext.
1. Understand the IoT Platform and ERPNext API
Before you start the integration process, it’s important to have a clear understanding of both systems:
- ERPNext: ERPNext is a modular, open-source ERP system that can be customized to meet specific business needs. It offers APIs (Application Programming Interfaces) for interacting with external applications and devices.
- IoT Platform: IoT platforms can range from simple sensors collecting data (e.g., temperature, humidity, machine status) to more complex platforms that aggregate data from various devices and process it in real-time. Some popular IoT platforms include ThingSpeak, AWS IoT, Google Cloud IoT, Azure IoT Hub, and custom-built platforms.
2. Define the Data Flow and Use Case
The first step in the integration process is to define the data flow and the use case. Identify what type of data you want to capture from the IoT devices and how this data will be useful in ERPNext. Some examples include:
- Inventory Management: IoT sensors can track stock levels in real-time, automatically updating ERPNext’s inventory records.
- Machine Monitoring: Sensors connected to machines or equipment can monitor temperature, pressure, or operational hours, sending alerts or updating maintenance schedules in ERPNext.
- Asset Tracking: GPS or RFID-enabled IoT devices can be used to track assets and vehicles, updating their status directly in ERPNext.
- Energy Management: IoT sensors can track power usage, sending data to ERPNext for analysis, enabling better energy management practices.
3. Choose the Right Integration Method
You have several ways to integrate an IoT platform with ERPNext. The approach depends on the IoT platform you are using and the type of data you wish to capture. The common methods are mentioned below.
A. Using REST APIs (For IoT Platform Integration)
Most modern IoT platforms provide REST APIs that allow you to send and retrieve data. ERPNext also has a built-in REST API for interaction with external systems.
Here’s how you can integrate via REST APIs:
- IoT Platform to ERPNext:
- Collect data from IoT sensors (e.g., machine status, temperature).
- Use the IoT platform’s API to push this data to ERPNext’s API endpoint.
- The data can be used to create or update records in modules like Maintenance, Inventory, or Sales.
Example: If you are using an IoT temperature sensor for monitoring a warehouse, the temperature data can be sent to ERPNext via its API. ERPNext can then trigger an alert if the temperature exceeds a set threshold.
- ERPNext to IoT Platform:
You can also use ERPNext’s API to send instructions to IoT devices. For example, ERPNext can trigger a relay to turn on or off machinery based on inventory levels or production schedules.
B. Using MQTT for Real-Time Data Streaming
MQTT (Message Queuing Telemetry Transport) is a lightweight messaging protocol commonly used in IoT systems for real-time data streaming. ERPNext doesn’t support MQTT natively, but you can use an intermediary service or custom code to bridge this gap.
Here’s how you can set up MQTT:
- Set up an MQTT broker (e.g., Mosquito or HiveMQ).
- Connect your IoT devices to the MQTT broker.
- Create a middleware service (using Python, Node.js, or other technologies) that subscribes to MQTT topics and processes incoming data.
- The middleware will then send this data to ERPNext via its REST API, creating or updating relevant records in the system.
Example: An IoT-enabled machine can send real-time operational data (e.g., machine health, production speed) via MQTT to the middleware, which then updates ERPNext’s Maintenance module with machine status or triggers alerts for preventive maintenance.
C. Using Webhooks
If your IoT platform supports webhooks, you can configure the platform to send HTTP requests to ERPNext when certain events occur. For example, when a machine in a production line stops, the IoT platform could trigger a webhook that sends the incident data to ERPNext, creating a maintenance ticket.
Steps for webhook integration:
- Configure the IoT platform to send webhooks on specific triggers.
- Define an endpoint in ERPNext that can accept the incoming webhook.
- Use ERPNext’s REST API to handle incoming data and create or update records.
4. Set Up Data Mapping and Automation in ERPNext

Once the IoT data is being sent to ERPNext, it’s crucial to map the incoming data to the relevant fields and automate workflows based on that data.
For example:
- If you’re using IoT sensors for machine health monitoring, the data might include parameters like temperature, vibration, or speed. You can create custom fields in ERPNext’s Maintenance module to store this information.
- Set up automated alerts or tasks in ERPNext to notify relevant team members if any of the data points exceed predefined thresholds (e.g., temperature rise or machine breakdown).
You can also create custom scripts or use ERPNext workflows to automatically trigger actions when certain conditions are met, such as triggering an email alert or generating a service request for maintenance.
5. Security and Data Integrity
Security is a critical aspect when dealing with IoT and ERP integration. Ensure that:
- Encryption: All data being transmitted between the IoT platform and ERPNext is encrypted (e.g., using HTTPS).
- Authentication: Use secure authentication methods (API keys, OAuth tokens) to ensure only authorized systems can access your ERPNext instance.
- Data Integrity: Implement checks to validate incoming data and prevent corruption or malicious interference.
6. Testing and Monitoring the Integration
After completing the integration, thoroughly test the system by simulating real-world conditions. This includes:
- Sending data from IoT devices and checking whether ERPNext records it correctly.
- Triggering alerts or tasks in ERPNext based on IoT data.
- Monitoring the system in real-time to ensure that data flows smoothly and there are no interruptions.
Conclusion
Integrating an IoT platform with ERPNext offers numerous benefits, such as real-time data monitoring, automation of workflows, and improved decision-making. Whether you’re tracking inventory, monitoring equipment, or managing energy usage, combining IoT with ERPNext can significantly enhance operational efficiency.
By following the right steps—choosing the appropriate integration method, ensuring data mapping, and maintaining security—you can leverage IoT to make your business processes smarter, faster, and more cost-effective.
If you need help setting up this integration, it’s recommended to work with ERPNext consultants or IoT integration experts to ensure smooth and efficient implementation.
If you are interested to achieve similar success stories, write to us!